InstallApplications for Dummies, Part 2
In my previous post, I explained the what, who, and why of InstallApplications and how its various components work together to provide a custom DEP enrollment. In this post, I will demonstrate how to set up and use IAs with SimpleMDM to achieve a custom DEP enrollment and bootstrap experience for your users.
Requirements
- InstallApplications 1.2.1
- DEPNotify 1.10
- Munki 3.4.1
- Apple Developer Program certificate
- MDM w/ InstallApplication/InstallEnterpriseApplication support
- A web server with HTTPS
Planning the Approach
The first step in planning a custom DEP enrollment process is setting goals and making a plan. This is a highly iterative process—your final product will likely be different from the initial plan as your requirements change, you reevaluate what you want to accomplish, or you just don’t like the how something looks. But it will help to have an idea of what you want to accomplish when starting out. Start small and expand and customize later on.
For the purposes of this setup, we will have a few basic goals:
- Most importantly, we want to install the munki tools. Once munki is installed (and configured with a configuration profile provided by SimpleMDM), it can handle the installation of a much broader array of apps, and in a much more robust and effective manner.
- Notify users that their machines are being set up. To achieve this, we will use DEPNotify, but there are other options, such as Yo.
- Run munki to get the machine set up and configured.
- Require users to log out to enforce FileVault encryption.
Your requirements may look different, Perhaps instead of munki, your primary management agent is Puppet or Chef, or you wish to inform users using a different method. Whatever your workflow, sketch it out, and remember that IAs is a bootstrap tool, and isn’t meant to do all the configuration and setup itself.
The Server
The Directories, Scripts, and Packages
I use AWS CloudFront serving files from S3 for the InstallApplications “server.” I find this to be the optimal solution, as it’s cheap, scales easily, and requires almost no management once set up. However, you can use any web server you are comfortable with, hosted where or however you like. The only requirements are that it be accessible at a consistent URL and use HTTPS.
At the root of your server should be your bootstrap.json file and three directories: preflight, setupassistant, and userland. These will contain the scripts and pkgs you wish to deploy during each of IAs stages. You can find the directory structure for this demo in the server/ directory in the demo repo here.

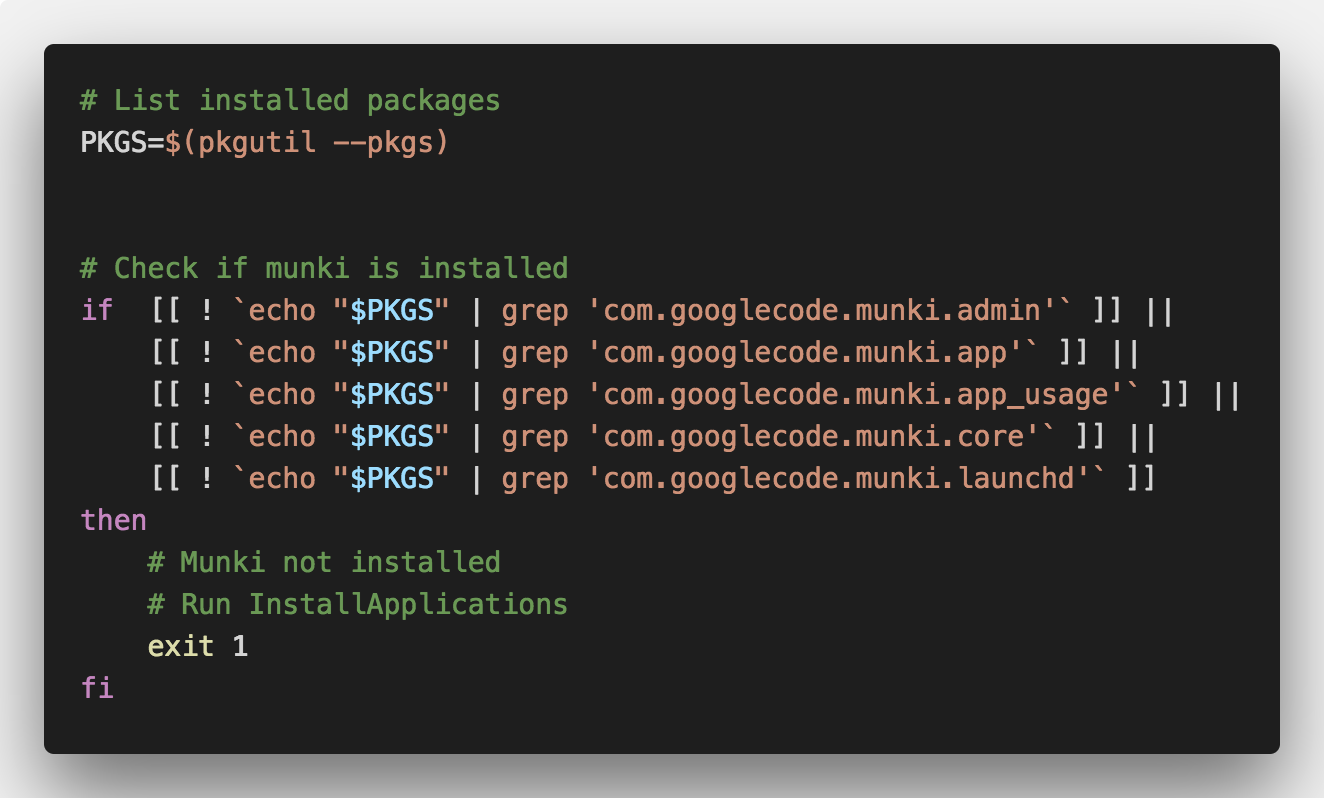
The only thing in the preflight/ directory should be the IAs preflight script. The exact contents of this script will depend on your workflow, but for our purposes, we’ll use this to check if munki has been installed. If any of the munki components pkg receipts are missing, the script will exit 1, causing IAs to continue it’s run. Otherwise, if all the receipts are present, it will exit 0 and IAs will clean itself up and remove itself.
In setupassistant/ we will place the DEPNotify-1.1.0.pkg that can be found here. That way, DEPNotify will already be installed and ready to launch as soon as a user logs in.
Finally, the rest of our files will be placed in the userland/ directory so they can run after a user account is created and logs in. Most of what we’re doing could be achieved without a user session, and so could included under setupassistaint/ instead. However a user may attempt to log in immediately, and won’t wait for munki to finish it’s initial run. This is why we use DEPNotify: users can log in immediately and will be kept apprised of the progress of setting up their machine.
The scripts we will use have been borrowed from Erik Gomez’s IAs demo repo. First, caffeinating the machine will keep the machine and screen from going to sleep if a user leaves during the configuration process. Next, the munki tools are installed (you can get the latest release here). Since we’ve already configured the Managed Installs preferences using a configuration profile delivered via MDM, munki will handle the rest of the machine configuration. The final step is the run_munki.py script, which, as you may have guessed, kicks off a munki run. Through this whole process, DEPNotify will keep users informed of what is being done to their machine as well as the next step they will need to take—in our case, logging off to enable FileVault encryption.
Generating the bootstrap.json File

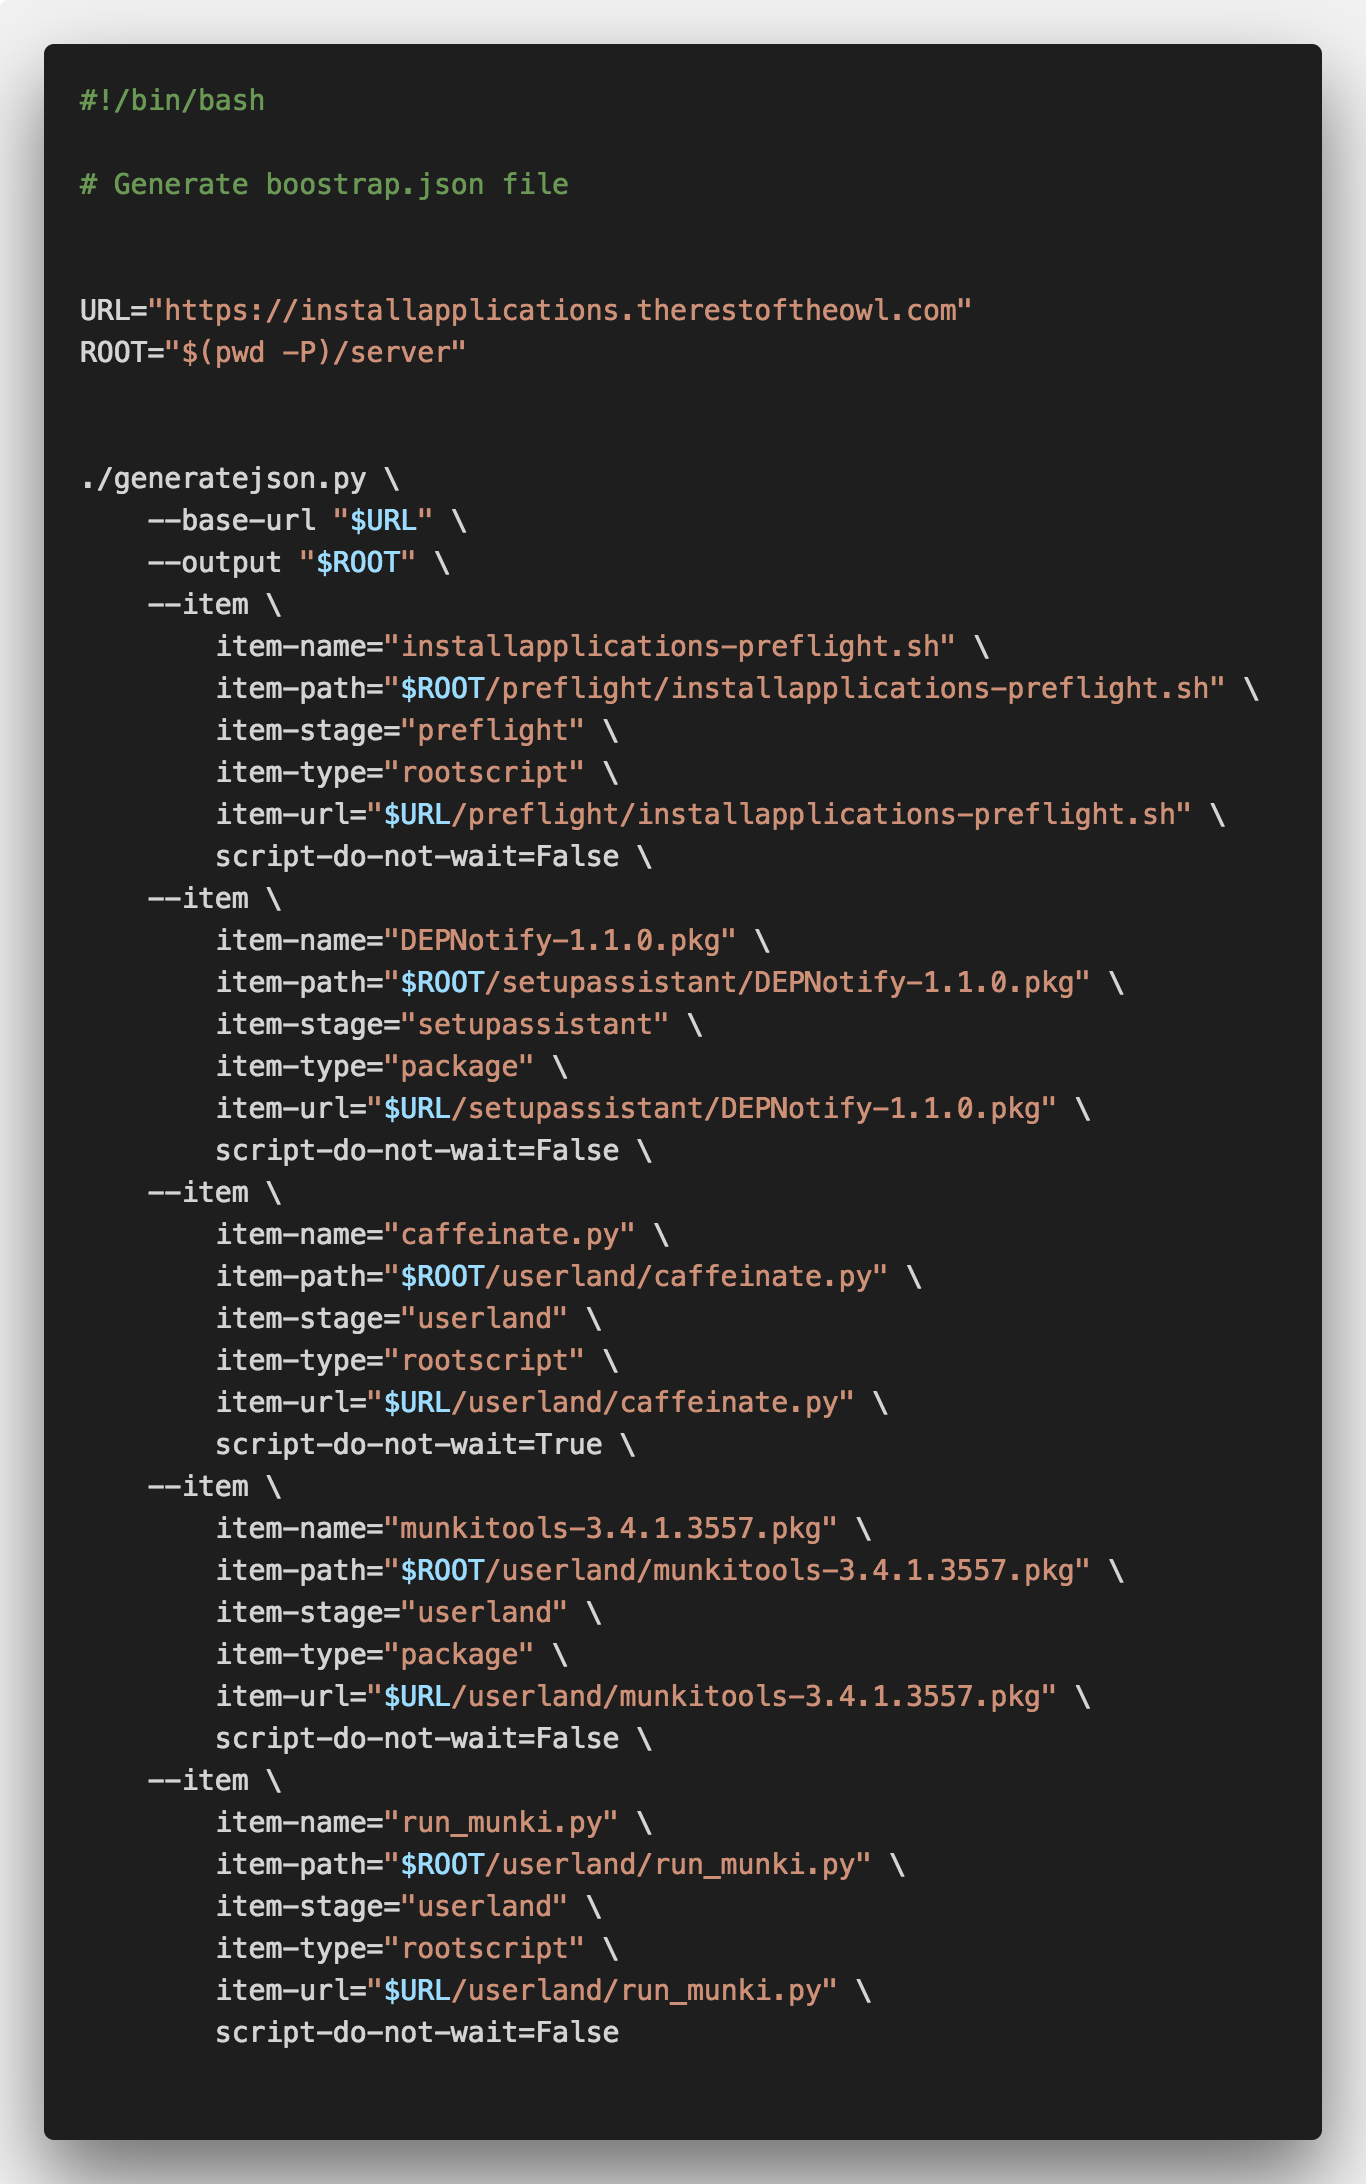
Now that we have the users and scripts collected in the correct directories, we need to use the provided generatejson.py script to create the bootstrap.json file. To make this process readable and repeatable, we will create a generatejson.sh file with all the options and flags we need. In addition to our server’s base (root) URL and the output location, we will also need to provide details such as the name, type, stage, path, and URL of the items to be included. We will also include the script-do-not-wait Boolean, which lets IAs know whether it should wait for the script to complete before moving on to the next item. We want to set this to True for the caffeinate.py script—we don’t want to wait ten minutes doing nothing before proceeding to the next item—and it may have uses in your workflow as well.
Running the generatejson.py script with these options will generate a properly formatted bootstrap.json file that includes all the necessary information about each item—not just the names, types, stages, paths, and URLs we provided, but details such as SHA-256 hash and the pkg version and ID. It also lets us set the order of items to be executed within each stage. We will upload is boostrap file to the root of our IAs server.
The InstallApplications Package
Configuration
Begin by downloading or cloning the InstallApplications GitHub repo. Before building, signing, and uploading the pkg file for distribution, we will need to make a few changes to the LaunchDaemon under payload/Library/LaunchDaemons/.
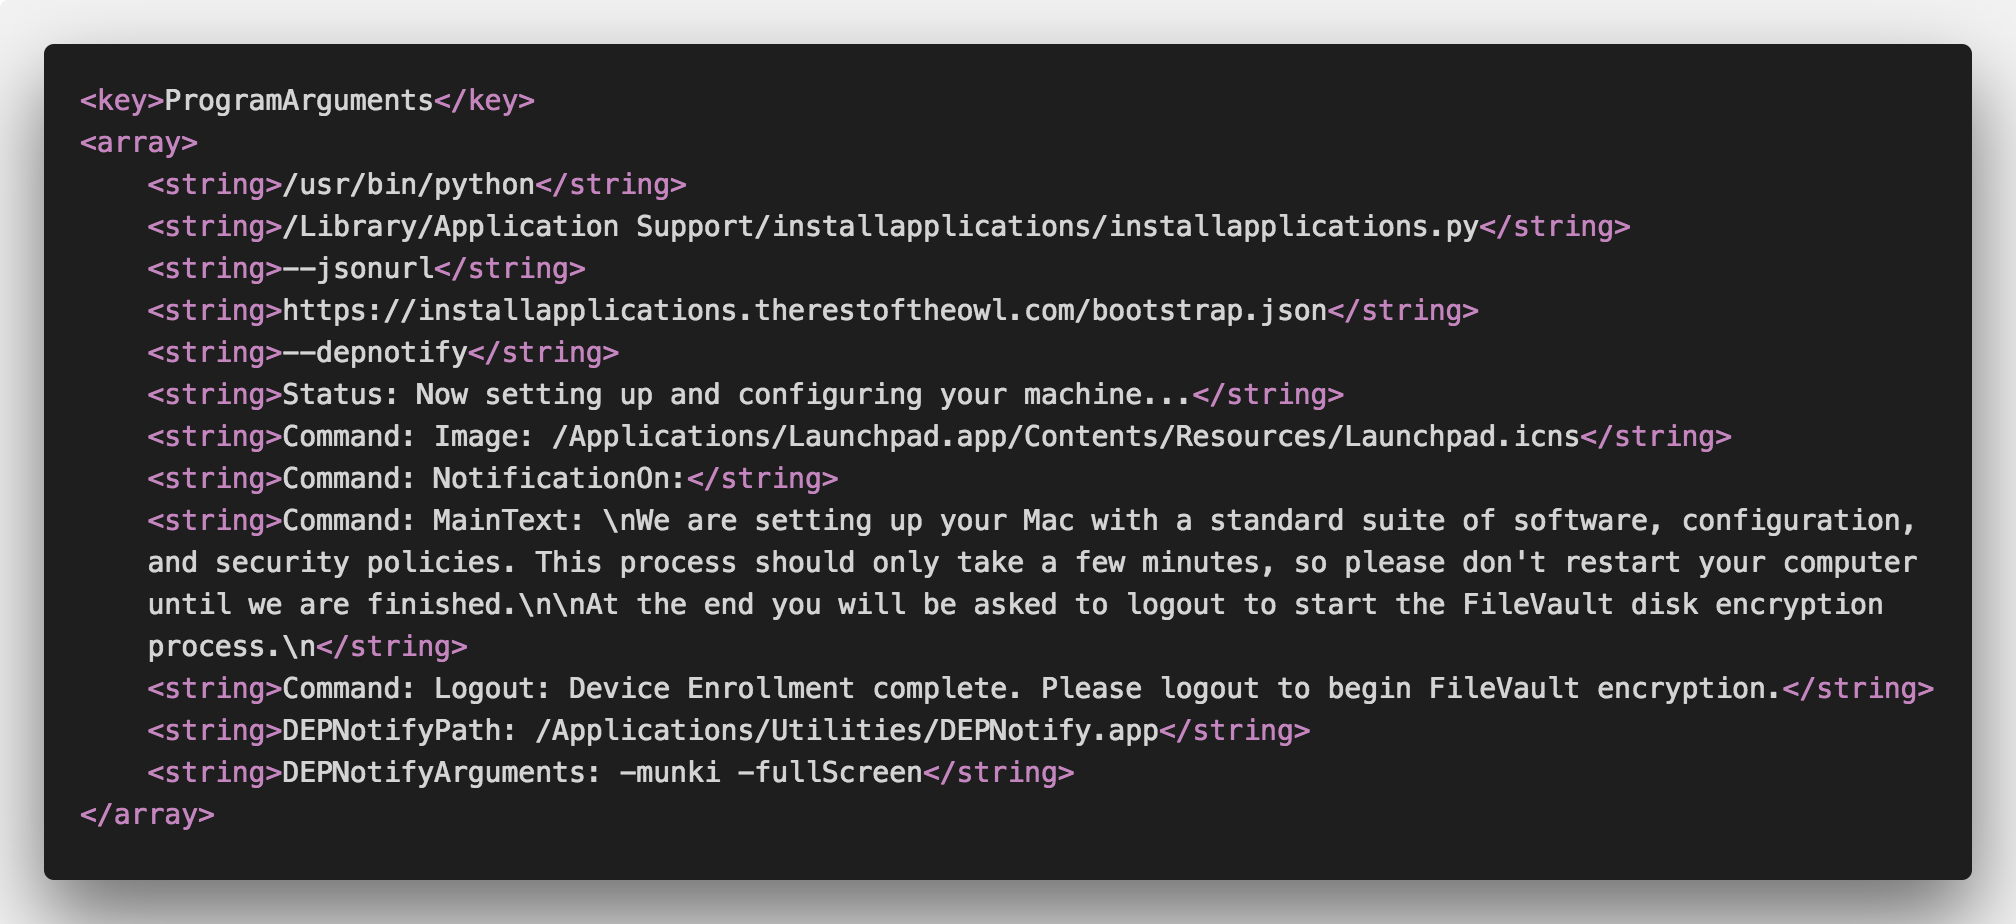
IAs has a number of custom flags that can be passed as arguments under the ProgramArguments in the LaunchDaemon. You can find the list of all supported flags in the IAs readme. The most important one is --jsonurl, which sets the URL of bootstrap.json file. This is the only required flag; without the bootstrap file, nothing can happen.
As of this writing and IAs version 1.2.1, the installapplications.py script supports the –depnotify flag, which allows passing arguments directly from the IAs LaunchDaemon to DEPNotify, a notification app designed to inform users about the DEP enrollment process. However, this functionality will soon be deprecated, largely to reduce complexity and improve the maintainability of the core IAs functionality. Nevertheless, it still works, so we will use it to set the image, message, and commands for DEPNotify.

Building and Signing the Pkg
To build the pkg file, you will need munkipkg and a certificate from the Apple Developer’s Program. This will run you $99 a year, and is required by Apple to install non-App Store packages via MDM. The InstallApplications wiki includes a page explaining how to sign the package, but the gist of it is you will need to specify your signing certificate in the build-info.json file like so:
"signing_info": {
    "identity": "Mac Installer: Erik Gomez (XXXXXXXXXXX)",
    "timestamp": true
},
Obviously, you will need to substitute your own certificate information.
Combining InstallApplications with additional packages
In some cases you may wish to combine the InstallApplications package with one or more additional packages. While this is generally discouraged, as it defeats much of the purpose of InstallApplications, it may be a requirement for certain workflows. For example, if you host munki on AWS CloudFront and need to deploy a CloudFront middleware and private key or other confidential information to client machines.
There are several things to be aware of for packages deployed in this manner:
- All bundled packages will install concurrently, so you will have no control over installation ordering. Be wary of race conditions.
- Packages cannot require a user session, as they will be installed immediately. For DEP workflows, this means during SetupAssistant.
- Additional packages will be installed and their scripts will run regardless of the results of the InstallApplications preflight script.
Ideally, additional packages should be limited to only those that absolutely require it (most likely secrets such as private keys). This not only allows you to take full advantage of InstallApplications, but also requires the final distribution package be signed and uploaded to your MDM less frequently.
Fortunately, this process is fairly simple.
- Build your InstallApplications package using the munki-pkg build file. You do not need to sign it.
- Build any additional packages you require that meet the requirements above.
- Combine the component packages into a signed distribution package using the
productbuildcommand:
$ productbuild --sign "Mac Installer: Erik Gomez (XXXXXXXXXXX)" --package InstallApplications.pkg --package Additional.pkg MDM-Distribution.pkg
More information on building distribution packages from multiple pkgs can be found here.
Uploading the Pkg to Your MDM
This step will be different depending on your particular MDM. For SimpleMDM you will need to navigate to Apps > Catalog and select Add App > macOS Packages. Drag and drop your signed pkg to upload it, and then it can be pushed out like any other app. As with anything, you should test it to make sure it works the way you want it to. If everything works correctly, we can push this pkg out to any machine that has munki installed, and the preflight script will exit InstallApplications silently.
Test, Test, Test!
Now that we have everything set up, the next step is testing. Ideally you will want to test the exact workflow you will use in production, be that out-of-the-box DEP machines, Internet Recovery, or some other method. However, it can be be difficult or tedious to test InstallApplications, especially when quickly iterating through minor changes. For all but the final tests, I have found the best method is using Apple Remote Desktop to install the IAs package while at the login screen of a mostly-clean virtual machine with the Managed Installs profile installed. This allows you to easily roll back the VM to a snapshot to test the next iteration.
As stated before, once your IAs pkg has been build and signed, you should not need to make any changes to it in the future. Instead, all the changes should be server-side by adding or changing the files on the web server and updating the bootstrap file to account for these changes. The principle exception to this is if you require changes to the LaunchDaemon flags for DEPNotify, but as mentioned above, this feature will be deprecated soon, and the functionality moved to the server.
Hopefully all of this has given you a solid understanding of how to use InstallApplications. At the very least, it should give you a good starting point to expand on and create a custom DEP enrollment and bootstrapping experience for your users.

